Back to the Sega Saturn sales page.
Sega Saturn 21pin Modchip Board V2 Installation
-
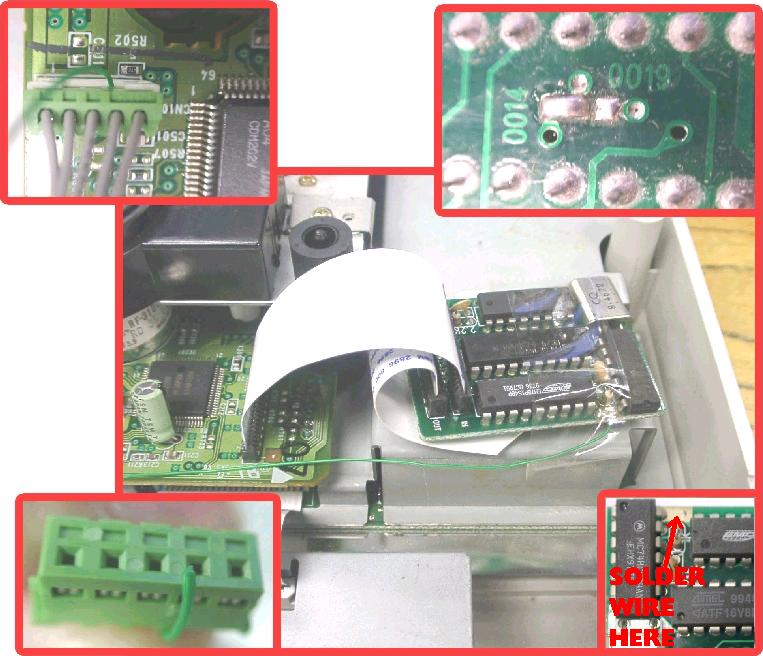
Connecting the ribbon cables: Remove the ribbon cable from the connector on the CD drive unit, leave the other end. Plug the loose end of the ribbon cable into the connector marked "OUT" on the mod board. Take the extra ribbon cable provided, plug one end into the "IN" connector on the mod board and the other end into the connector on CD Drive unit.
-
The 5V wire: Solder some thin wire to the large solder pad near the corner of the mod board (where the green wire goes in the big picture above). Unplug the the green plug on the CD Drive unit, carefully insert the loose end of the wire as shown in the picture and plug it back into its connector Or instead of using the green plug, you can solder to the +5V pin on the power supply board - we prefer this method.
-
How to set the mod board for your Saturn:
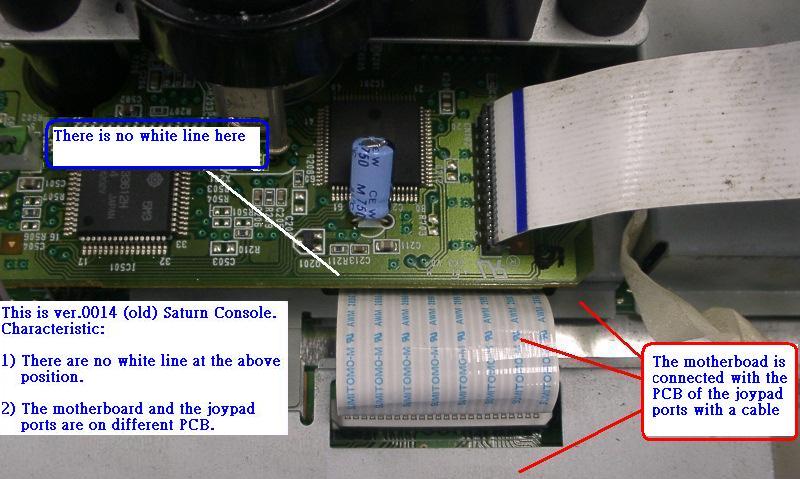
If your Saturn's CD Drive board looks like this:
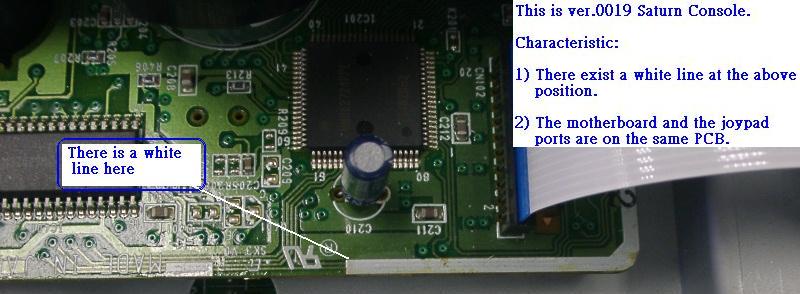
Then do this:
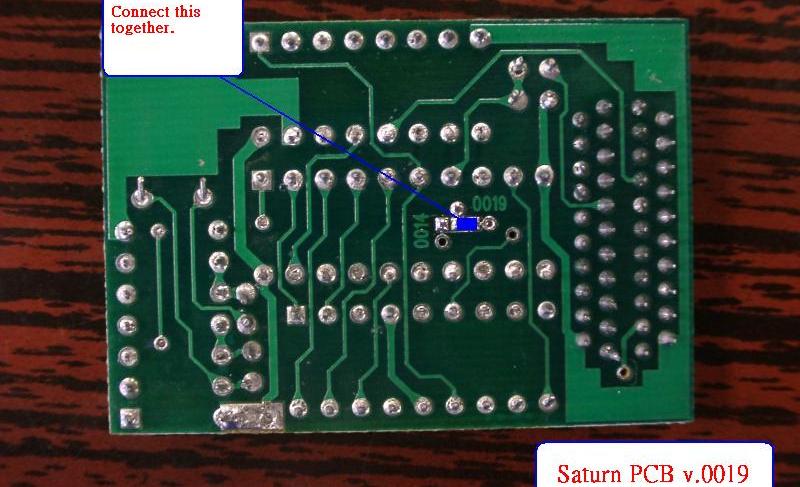
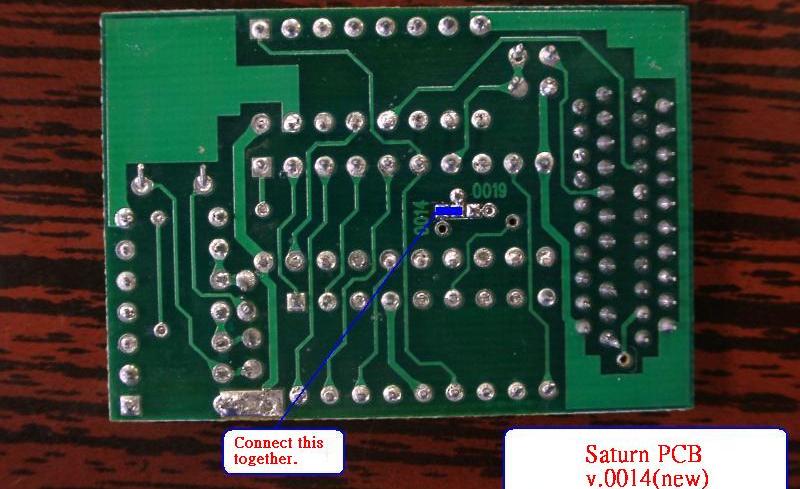
If your Saturn's CD Drive board looks like this:
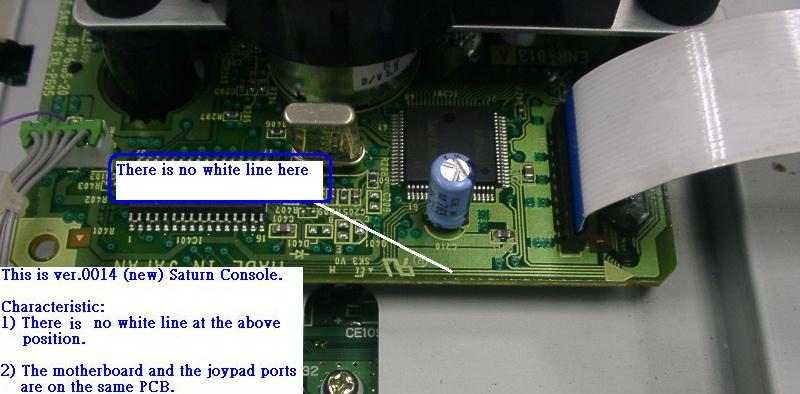
Then do this:
If your Saturn's CD Drive board looks like this (the 64pin version):
Or like this (a Sanyo version):
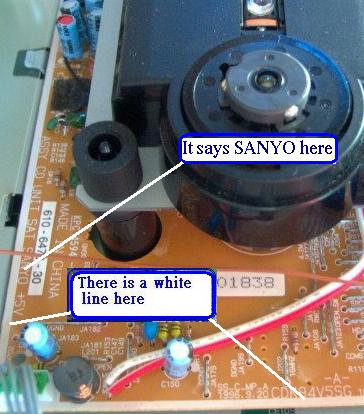
Then do this:

Notes:
- Check ribbon cables are plugged in the right way round so the pins on the ribbon cable meet the pins on the connector
- Use a piece of card or plastic etc. to insulate the mod board from the metal RF shield, use tape to hold everything in place. Obvious, but worth mentioning!
- Depending on the version of your console, you may find the board ends up in a different position to that shown in the picture.